|
|
|
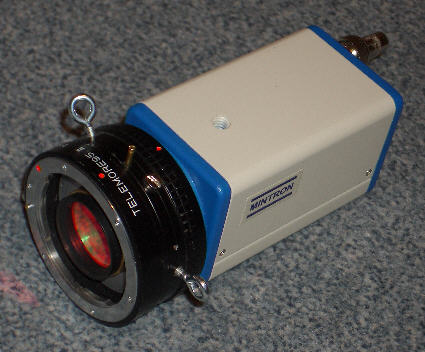
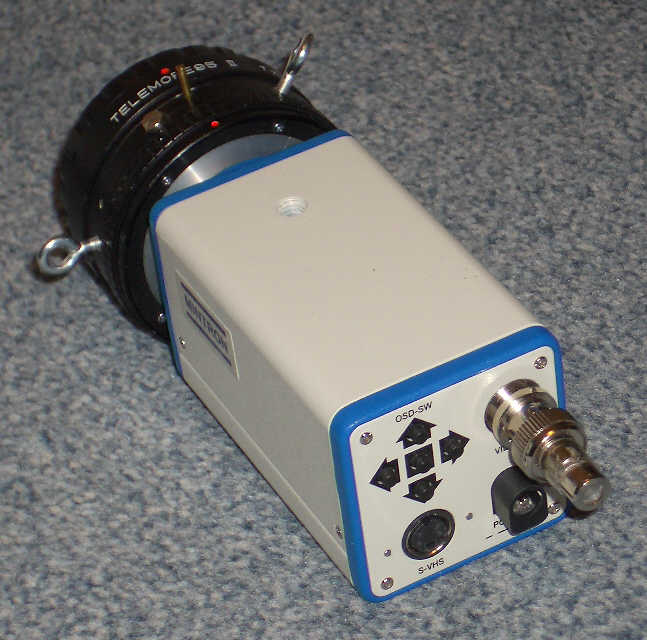
Since a few years amateur astronomers love the Mintron CCTV-camera MTV 12V1C-EX because of the high performance for the money. Originally an industrially built camera for surveillance purposes it sports an extremely sensitivity by adding internally up to 128 half frames. According to CCIR and PAL standards each frame has a maximum exposure time of 20 milliseconds totalling a maximum exposure time of 2.54 seconds. Combined with the low-noise SONY CCD-Chip ICX429AL that makes a low budget black&white CCD-camera for astrophotography.
Features:
Black&white images (colour composites require RGB-filters)
Live image on a TV-set or computer monitor e.g. for demonstrations to the public
Live focussing with a monitor or TV-set
While the Mintron MTV 12V1C-EX camera is cheaper than a native CCD camera for astrophotography more efforts are necessary for image processing. The extremely sensitive CCD-Chip (quantum efficiency up to 85% at a wave length of 610 nm) has a quite inhomogenously illuminated background. The left edge and especially the upper left corner suffer the infrared radiation of the read-out amplifiers. That makes dark-frame subtraction and flat-fielding somewhat difficult. 2.5 seconds per frame mean about 600 frames in 25 minutes. That is the capacity of a 700MB CD-ROM and that is why I limit the total exposure time to 25 minutes per object. It allows me to store all original data on CD-ROM in case I want to reprocess them later.
The Mintron CCTV-camera supplies an analog video signal either via a FBAS or Cinch connector or via a S-VHS connector. Both require a frame grabber to convert the analog signal again into a digital one. I said "again" because the camera works internally already with digital data and converts them for the output. There is no possiblity to access the digital signal and to transmit that digitally to the computer. I use a frame grabber (without TV-tuner) from Hauppauge. No problems. All programs that support the VFW standard can be used for image acquisition. I use the freeware program Giotto by Georg Dittié (there is only a German version available) for image acquisition, stacking and processing. The raw images are stored in an AVI file without any compression. The next step is to scan the AVI file with the program VirtualDub and to discard all frames of substandard (whatever I define as substandard) quality and to store the data again in an AVI file.
There are two popular and free-of-charge programs for image stacking available, Registax (in English) and Giotto (in German). Both subtract the dark frames before registering and averaging the frames. They do it automatically once you have drawn a box around some stars that shall serve as the reference for registering the frames. The stacking process can take some time (depends on the computer hardware). Therefore, I recommend to save the result in the FITS-format to save as many information in the image as possible. Giotto uses internally 16 bits per colour as default. This is supported by the FITS-format. Other file formats may use only 8 bits per colour. The lower number of bits may have an adverse impact on the following image processing steps.
For the following image processing steps like gradient scaling, noise reduction, sharpening and background flattening I use various programs. There are a lot of image processing programs around. Important is that you know how to operate these programs and that they can read the file formats you use.
I do astrophotography with the Mintron camera in my backyard which is quite small. So I am a little bit restricted regarding the choice where to setup the telescope. On the other hand I can take advantage of the infrastructure available being such close to my house. Unfortunately, to the north the house blocks the sight to the celestial pole. It is impossible to align the mount with the help of the polar axis scope. What I do is, I align the tripod feet along the tiles on the floor and level the mount horizontally. I never touch the elevation of the polar axis. That has been adjusted to the correct latitude at a different location where I could see Polaris. Due to this procedure the polar axis does not point exactly to the celestial pole. But the misalignment is very small and tolerable. If I follow this procedure carefully the stars are round enough.
Nevertheless, as times goes by the field of view moves a little bit. On the one hand because of the periodic error of the mount but more seriously because of the misalignment of the polar axis. With a second hand controller (homemade copy of the original one) next to the keyboard of my PC I can re-center the position of the object in the field of view. Of course, when the mount moves due to the correction the stars are no longer round but little lines. But that is no problem, such frames are sorted out with VirtualDub.
Technical Data:
Chip-Typ: SONY ExView ICX-429ALL (HAD-Typ)
Resolution: physically 795 x 596 pixel, of which 768 x 576 are used according to CCIR/PAL standard
Pixel size: physically 8,6 x 8,3 µm (Chip size: 6,9 x 5,0 mm)
Sensitivity: Maximum at 610 nm, at 800 nm still 50% of maximum at 610 nm, from 440-710 nm minimum 80% of maximum sensitivity
Exposure times: 0,0001 - 2,5 s
Amplification: Automatically or manually (recommended !) adjustable in several steps, can be switched off
Zoom: Digitally up to two times (but no gain of details)
For more information regarding the camera click here and here or here. The first two links call pages in German, the last link calls the manufacturer's site. I believe that the Stellacam-EX by Adirondack Astro&Video is the same camera, however with a separate hand controller and (for some countries most important) compatible to the EIA/NTSC standard.


